
Zeroing and Adjusting a Firearm with Rear Sight and Front Sight
- Preparation
Before zeroing the firearm, certain preparations are necessary:
- Safety Check: Ensure the firearm is unloaded and no one is in the line of fire.
- Choice of Ammunition: The ammunition should be suitable for the firearm and the intended purpose.
- Shooting Range and Support: Use a stable rest or shooting bench to shoot as precisely as possible.
- Target: Set up a clearly visible target at an appropriate distance (e.g., 25 or 50 meters, depending on the firearm and its intended use).
- Initial Test Shots
- The firearm is placed in a stable position on the rest.
- Three to five test shots are fired at the target.
- The impact points are checked to determine any deviations from the intended center.
- Adjusting the Sights
The rear sight and front sight must be adjusted based on the impact points:
- Vertical Adjustment: If the shots are too high or too low, adjust the rear sight up or down (shots too high = lower the rear sight, shots too low = raise the rear sight).
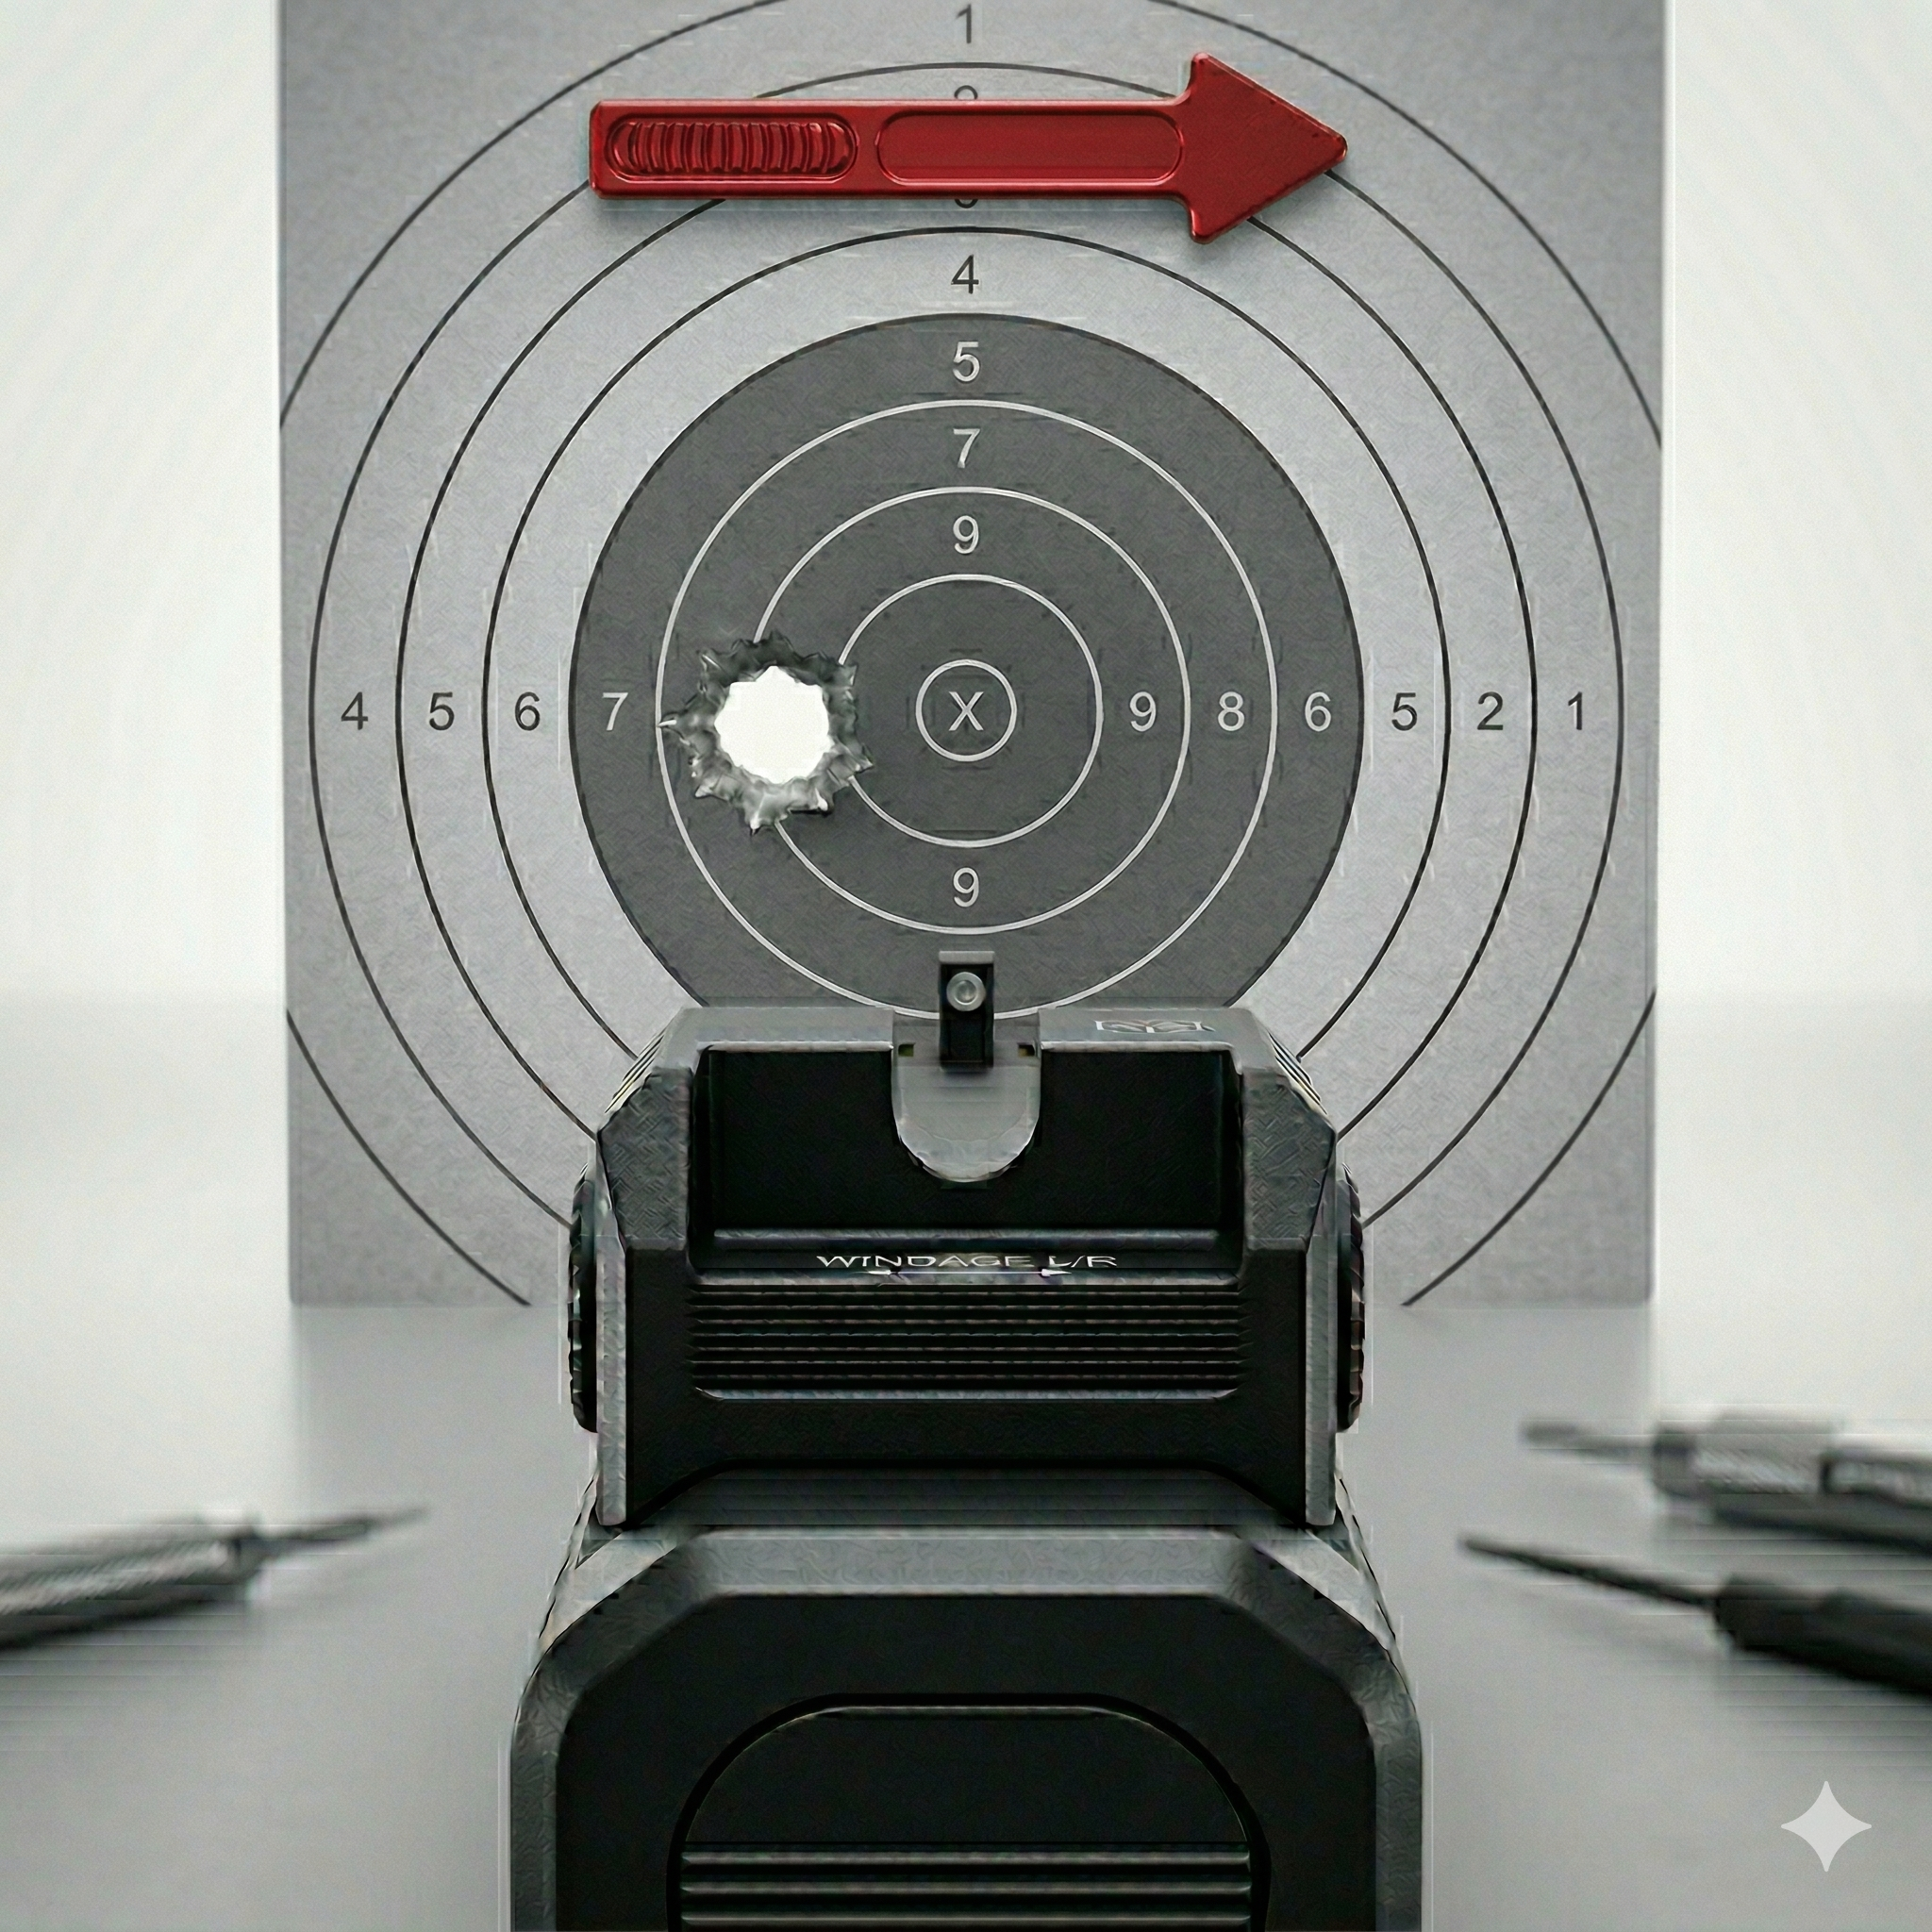
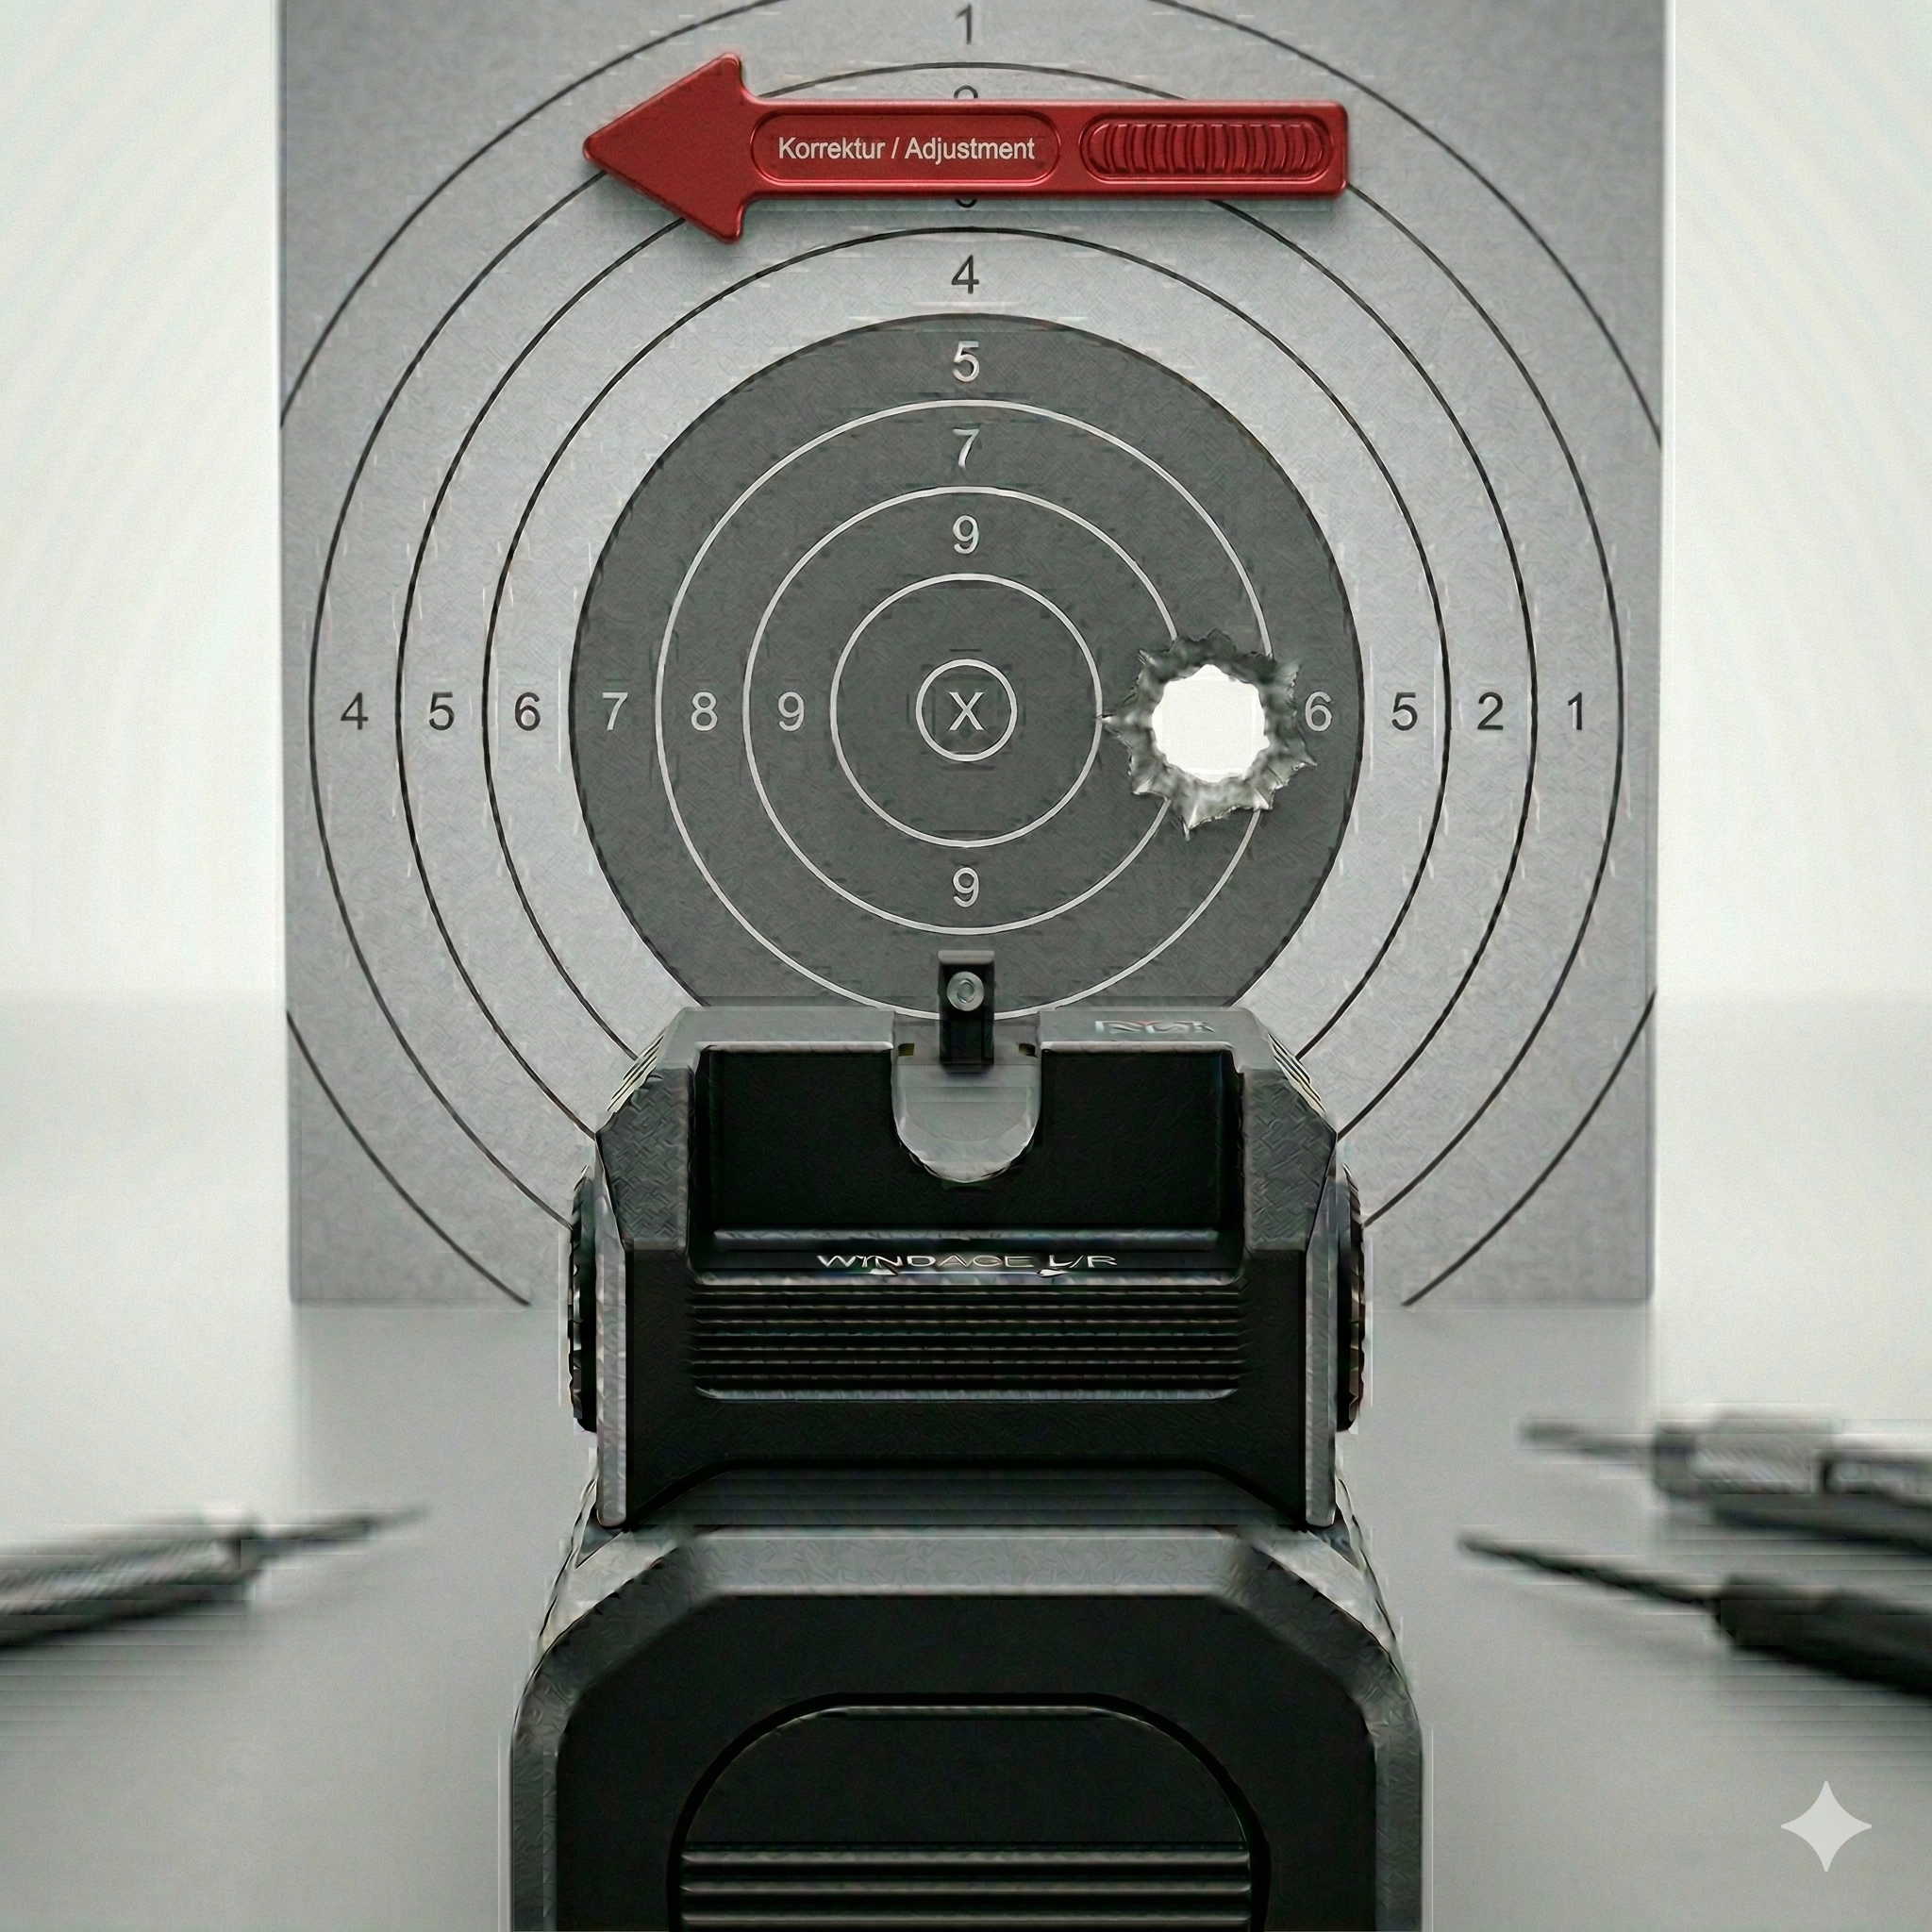
- Horizontal Adjustment: If the shots are too far left or right, adjust the rear sight laterally (shots too far left = move the rear sight to the right, and vice versa).
- The front sight is usually fixed, so the adjustments are generally made with the rear sight.
- Basic Principles for Zeroing a Firearm with Rear and Front Sights
-
Proper Sight Alignment:
- The rear sight and front sight must be aligned.
- The front sight should be centered in the rear sight, with the top edges being level.
- The target should appear just above the front sight post ("center hold") or slightly above it (depending on where the shots are landing).
-
Sight Misalignments:
- Low Shots: The front sight is too low in the rear sight.
- High Shots: The front sight is too high in the rear sight.
- Lateral Deviations: The front sight is not centered in the rear sight.
-
Corrections During Zeroing:
- If the shots are too low or too high, adjust the sights accordingly.

low hit

high hit
-
- If the shots are deviating left or right, adjust the rear sight laterally.
left hit
right hit
- Fine-tuning and Checking
After the adjustment, fire three to five more shots.
- The new impact points are checked.
- If necessary, continue adjusting the sights until the shots are consistently near the center of the target.
- Completion and Documentation
Once the firearm is properly zeroed, the adjustments should be noted.
- If the firearm is regularly used, it is recommended to document the zeroing settings and any deviations for future reference.
- After zeroing, the firearm should be unloaded safely, cleaned, and stored properly.
Conclusion
Correctly zeroing a firearm with rear and front sights requires patience and precision. By following a systematic approach, accurate shot placement can be achieved, improving the firearm's accuracy and effectiveness.
 Deutsch (Österreich)
  English (United Kingdom)